Unit II · Baddi — A, B, CD, F, GH
Environmental Monitoring
User Guide
You manage plate exposure outside the cleanroom. Every action you take is timestamped, attributed, and permanently logged. This guide walks you through every step — from your first login to exporting a GMP-ready PDF record.
Before you start
Complete the Admin Setup checklist. Map your EM plates. Freeze the layout. Then you're ready to run rounds.
During a round
Log PLACED and RETRIEVED events for every plate from the Rounds panel or directly on the floor plan canvas.
After exposure
Retrieve All closes exposure. Log incubator-in, enter colony counts after the 120h gate, mark checked, and export the PDF.
01 — Overview
What you're looking at
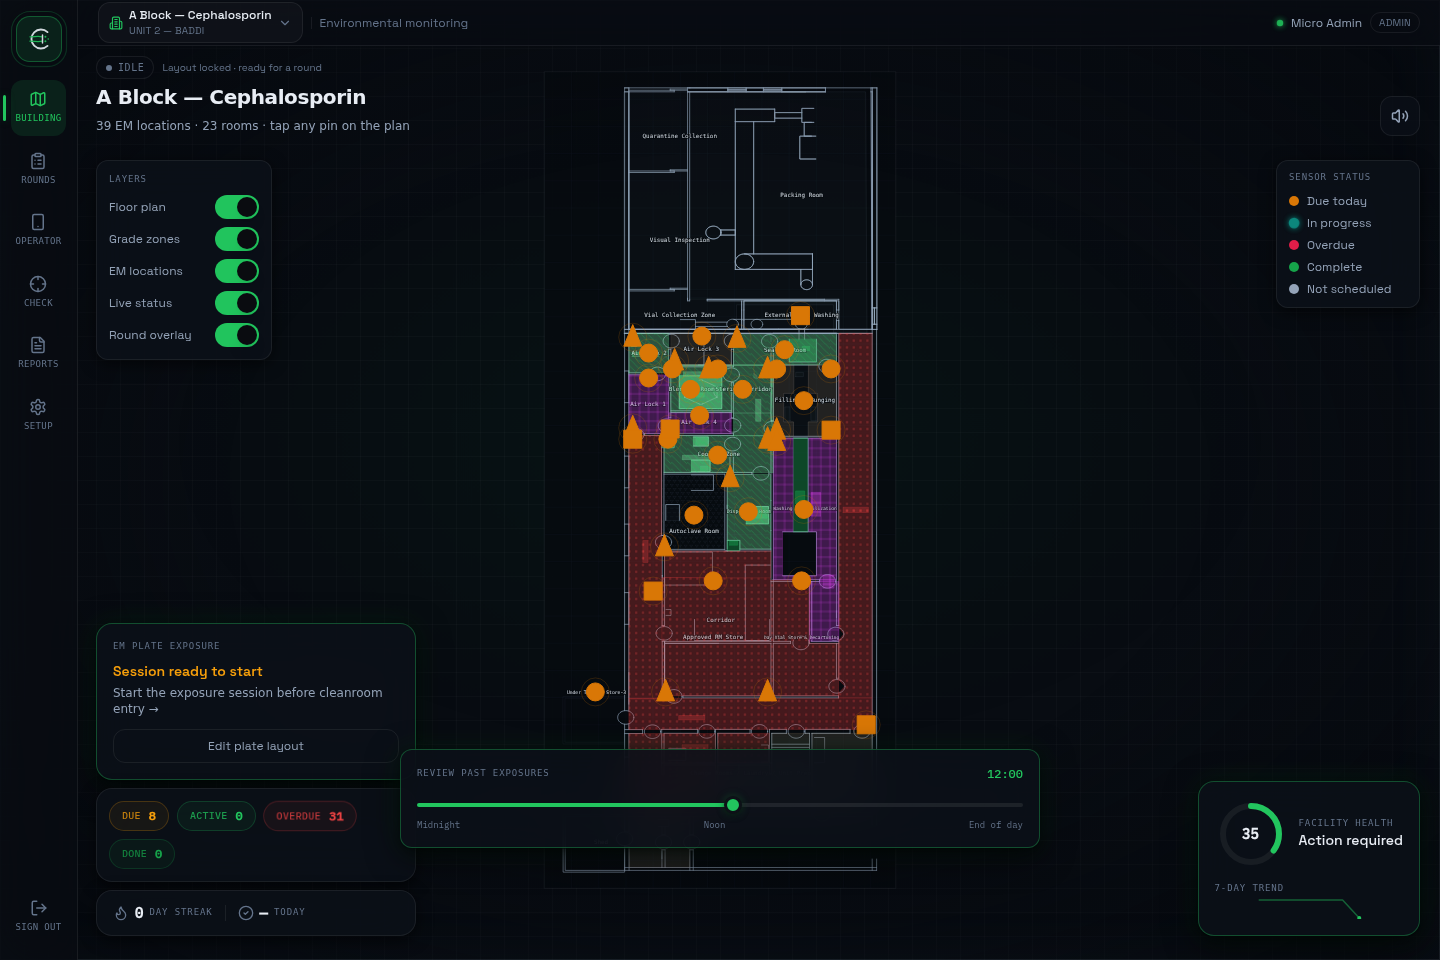
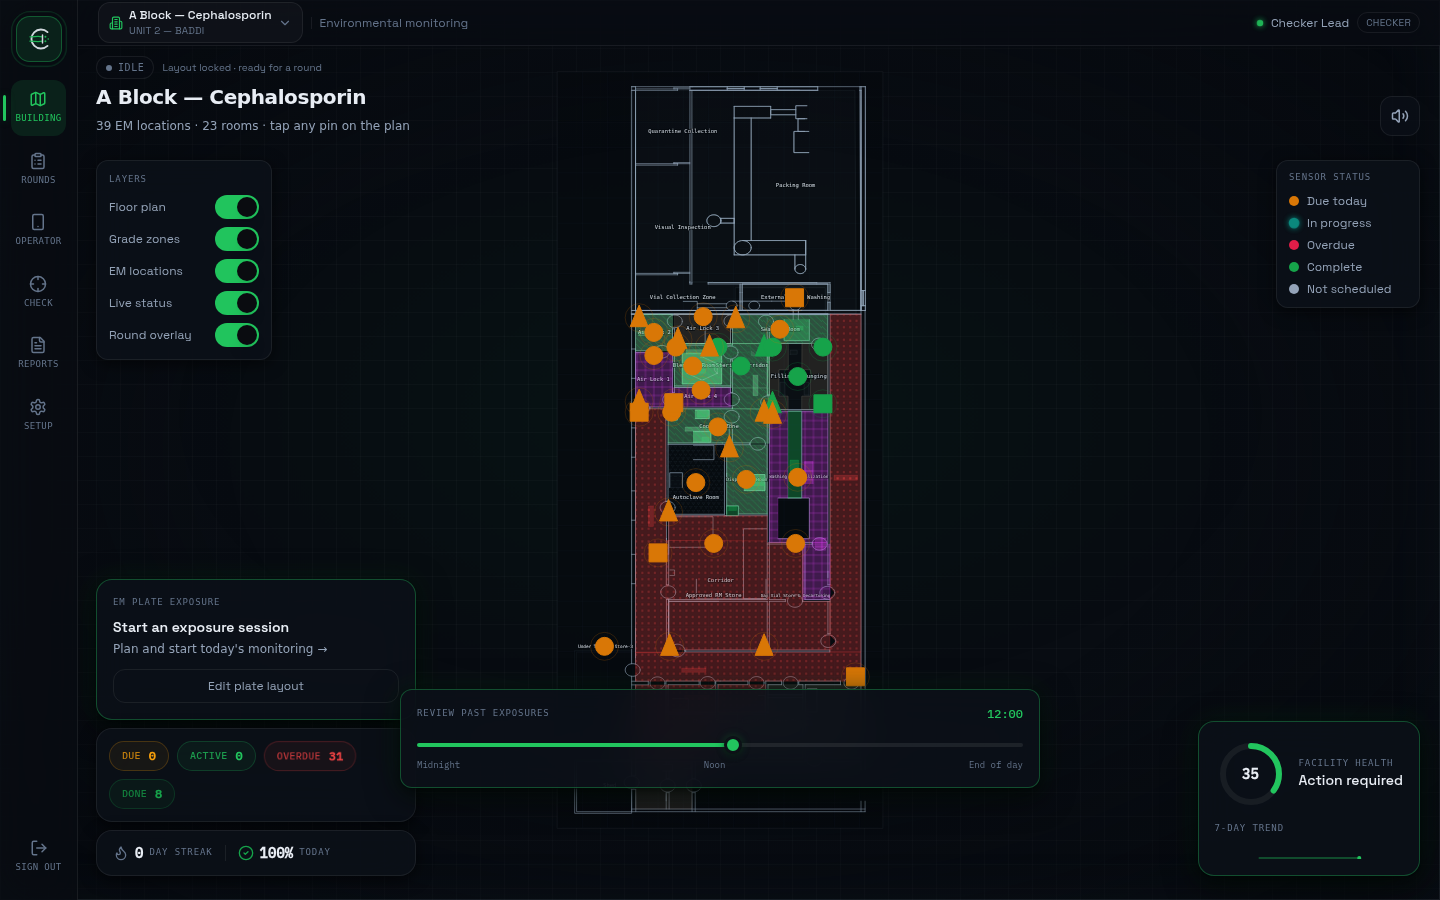
When you log in, you land on your facility's live floor plan — drawn to true scale with every EM location pinned exactly where it sits on the cleanroom floor. You never carry a device into the grade zones. You plan, log, and sign off from right here.
Floor plan canvas
The Konva-rendered facility map. Pins mark every settle plate, air sampler, and surface swab location. Pin colour = grade zone. The ring around each pin shows the current round state.
Mode panel
The control card on the right side of the screen. Switches context without reloading the floor plan — Building, Rounds, Check, Reports, or Setup.
Navigation rail
The icon strip on the far left. One click changes the mode panel. The floor plan underneath stays live at all times regardless of which mode you're in.
Live HUD
Status cards overlaid on the canvas during an active round — shows T1 timestamp, plate counts by status, and the process-time buffer for the current grade zone.
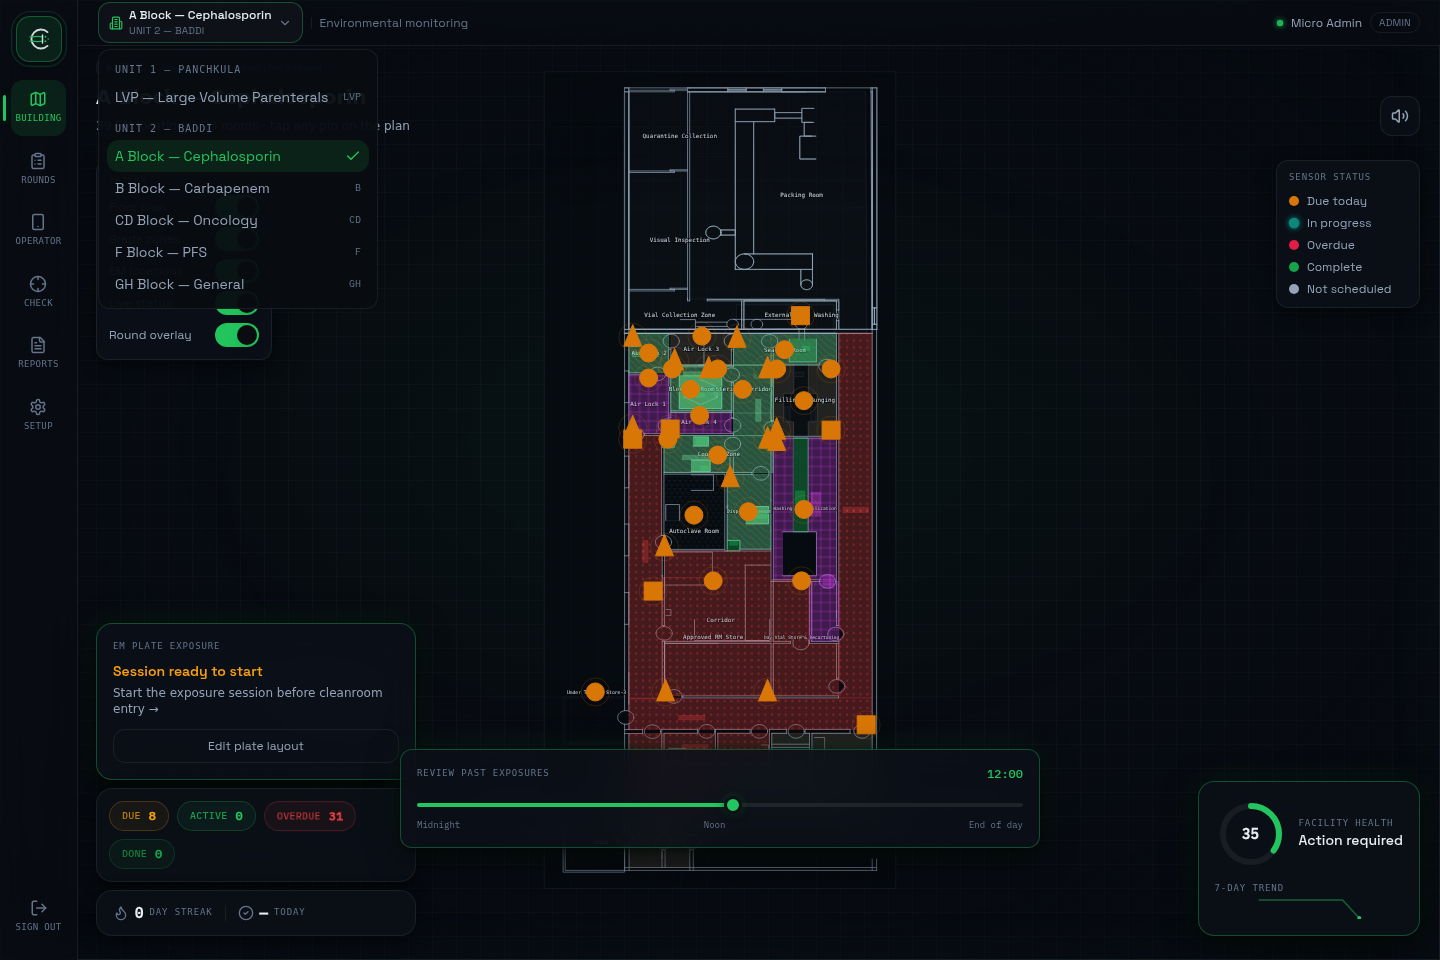
◎Facilities and units
02 — Roles
Who can do what
Three roles, each with a clear lane. Every action any user takes is permanently recorded with their name, role, and a precise timestamp.
Runs the rounds. The primary user during a sampling shift.
Can do
- ✓Start rounds, record Place All/Retrieve All, and log incubation + colony counts
- ✓Log plate events — Placed, Retrieved, Deviation, Skipped
- ✓View the live floor plan and active round progress
- ✓Export PDF records for closed and checked rounds
Cannot do
- ✕Map or freeze EM plate positions (Check mode)
- ✕Open Setup — master data, users, media, or process timings
- ✕Work in a facility they haven't been assigned to (Setup → People)
Owns the floor plan layout and signs off on rounds. Typically the QA/microbiology lead.
Can do
- ✓Everything an Operator can do
- ✓Open Check mode to add, move, or remove EM pins, and freeze/unfreeze the layout
- ✓Open Setup to manage rooms, EM locations, media batches, and process-time offsets
- ✓Mark a round checked once the 120h gate and colony counts are complete
Cannot do
- ✕Create, edit, or deactivate user accounts (admin-only)
Configures the system. Typically the QA manager or IT lead.
Can do
- ✓Everything a Checker can do
- ✓Create, edit, and deactivate user accounts, and assign roles
- ✓Assign operators to the facilities they work in
- ✓Access the full audit trail
✦New operator? Assign them to a facility first
04 — Rounds
Running an EM round
A round is the complete exposure and incubation cycle for a set of grade zones. It moves through six clear stages — the timeline below shows the flow at a glance.
Plan
Choose grade + shift
Start · T1
Confirm operator + media
Place All
Start exposure
Retrieve All
Close exposure
Incubation
120h gate + counts
Checked
Part of the audit trail
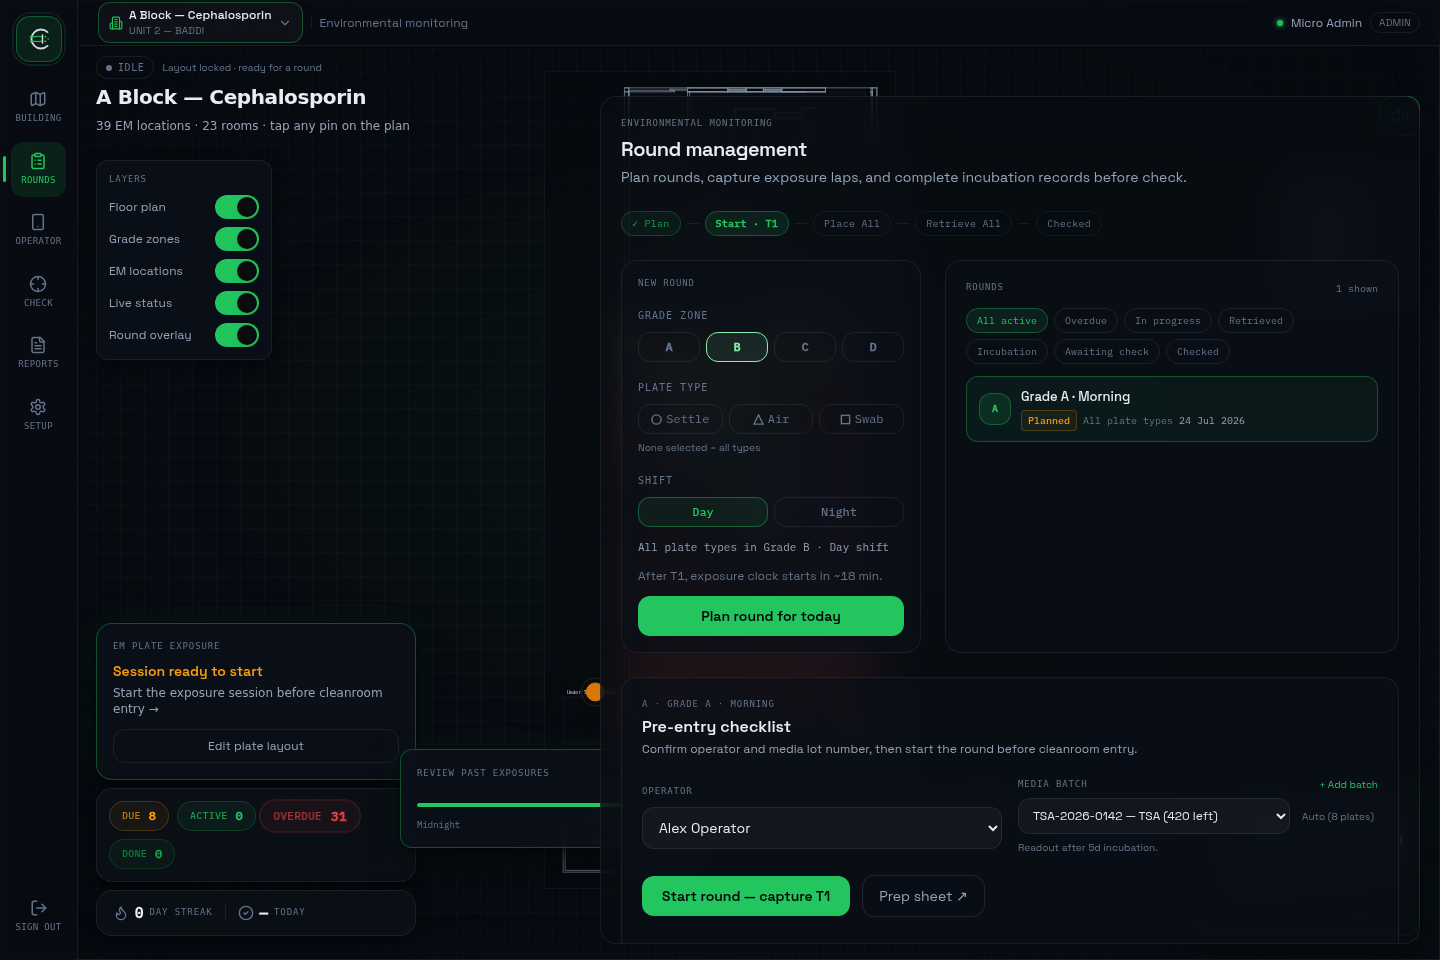
Plan a round for today
PlanSelect one or more grade zones (A, B, C, D), optionally filter by plate type, and pick a shift (Day or Night). Click Plan round for today. The round appears in Today's Rounds with status Planned.
Confirm operator and media, then start
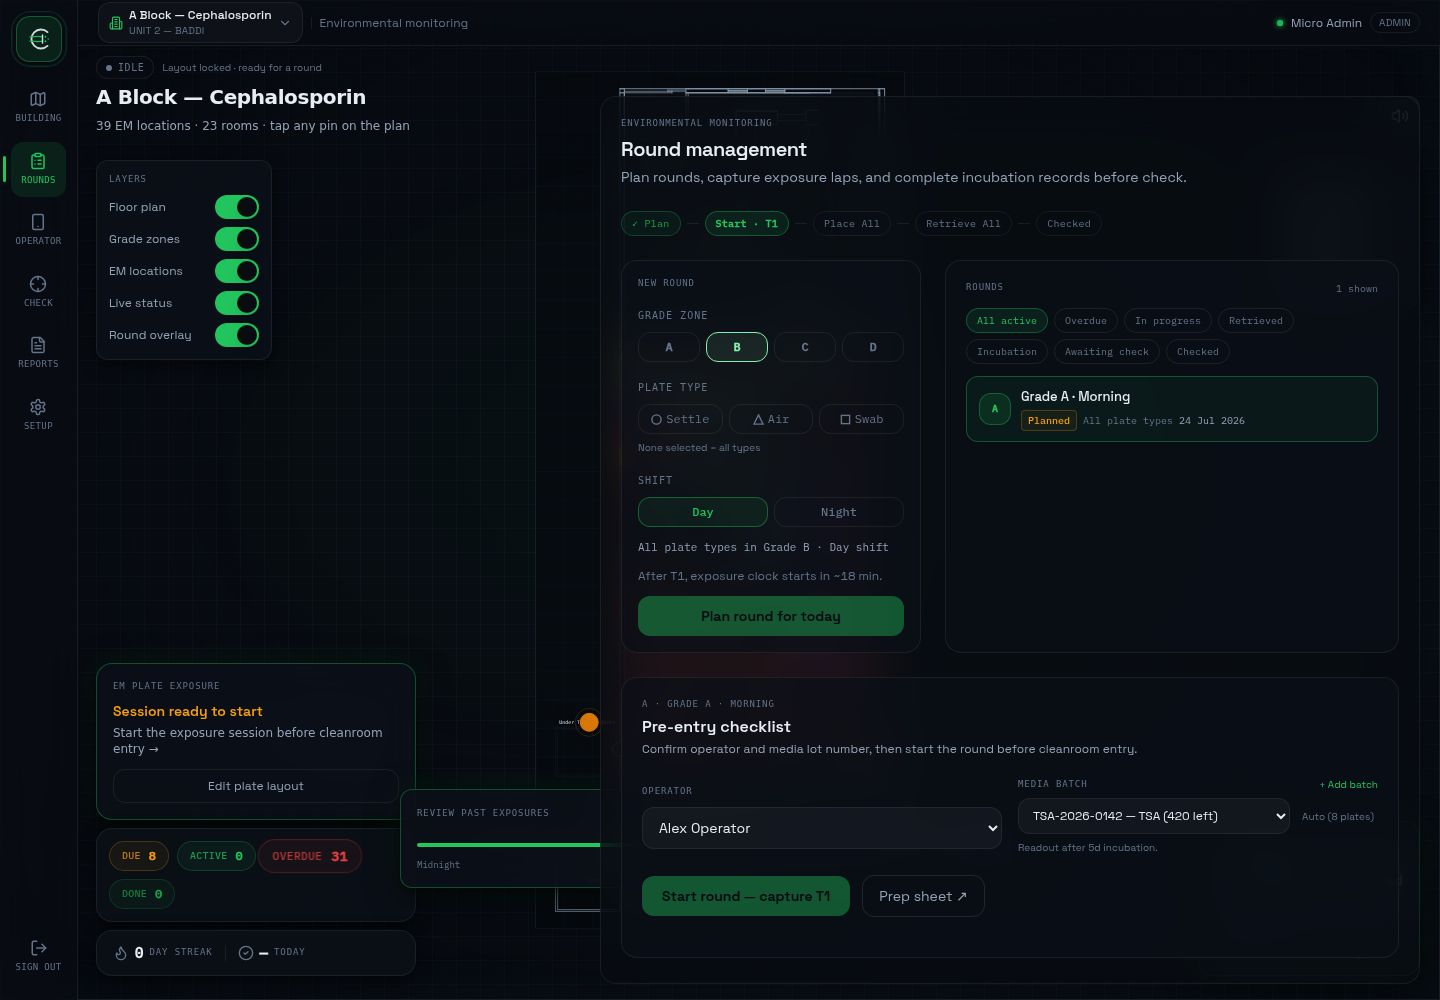
Start · T1Select the operator and media batch (lot number). Click Start round — capture T1. The T1 timestamp is recorded and the round turns live. The process-time buffer for the grade zone is displayed so operators know when to enter the cleanroom.
Start exposure
Place AllAfter the configured entry/transit time, press Place All. If placement happens early, the app refuses the action until you provide an override reason — that reason becomes part of the round's permanent timeline.
Close exposure, not the round
Retrieve AllWhen all plates are collected, click Retrieve All. The exposure phase is closed, missing plate events are auto-completed for the selected round locations, and the round moves into incubation.
Log incubator-in, then wait for the 120h gate
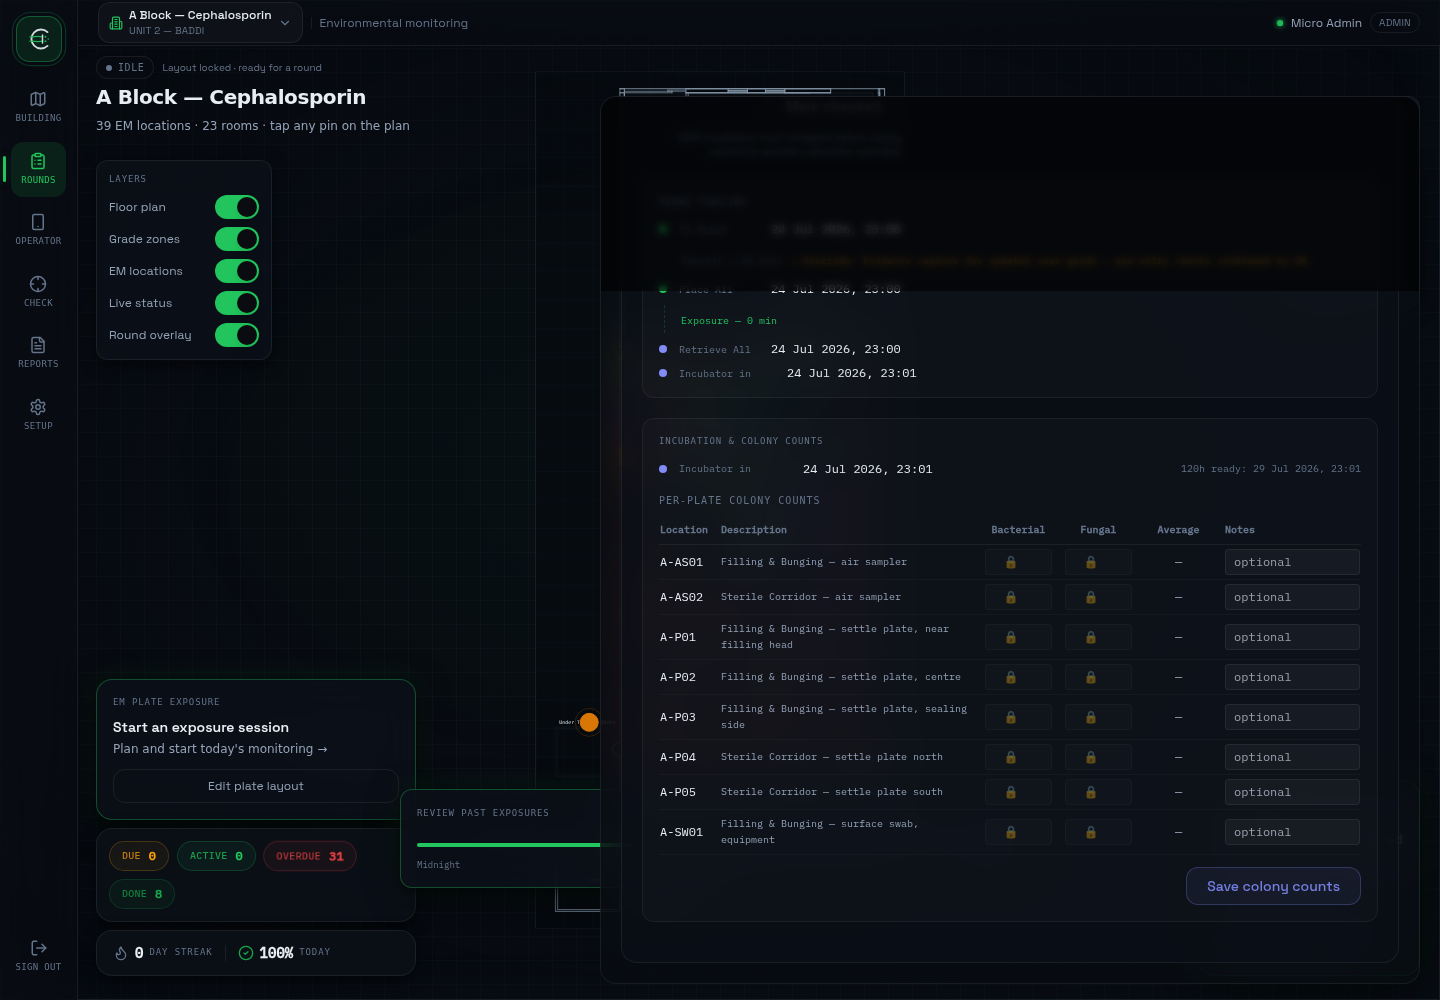
IncubationLog incubator-in from the round panel. This unit runs one plate through two incubators in sequence and reads both organisms together, so colony-count fields stay locked until 120 hours have passed since incubator-in — the panel shows the exact ready time. Entering counts earlier is possible, but only with a deviation reason, which is audit-logged the same way the Place All override is.
Mark checked
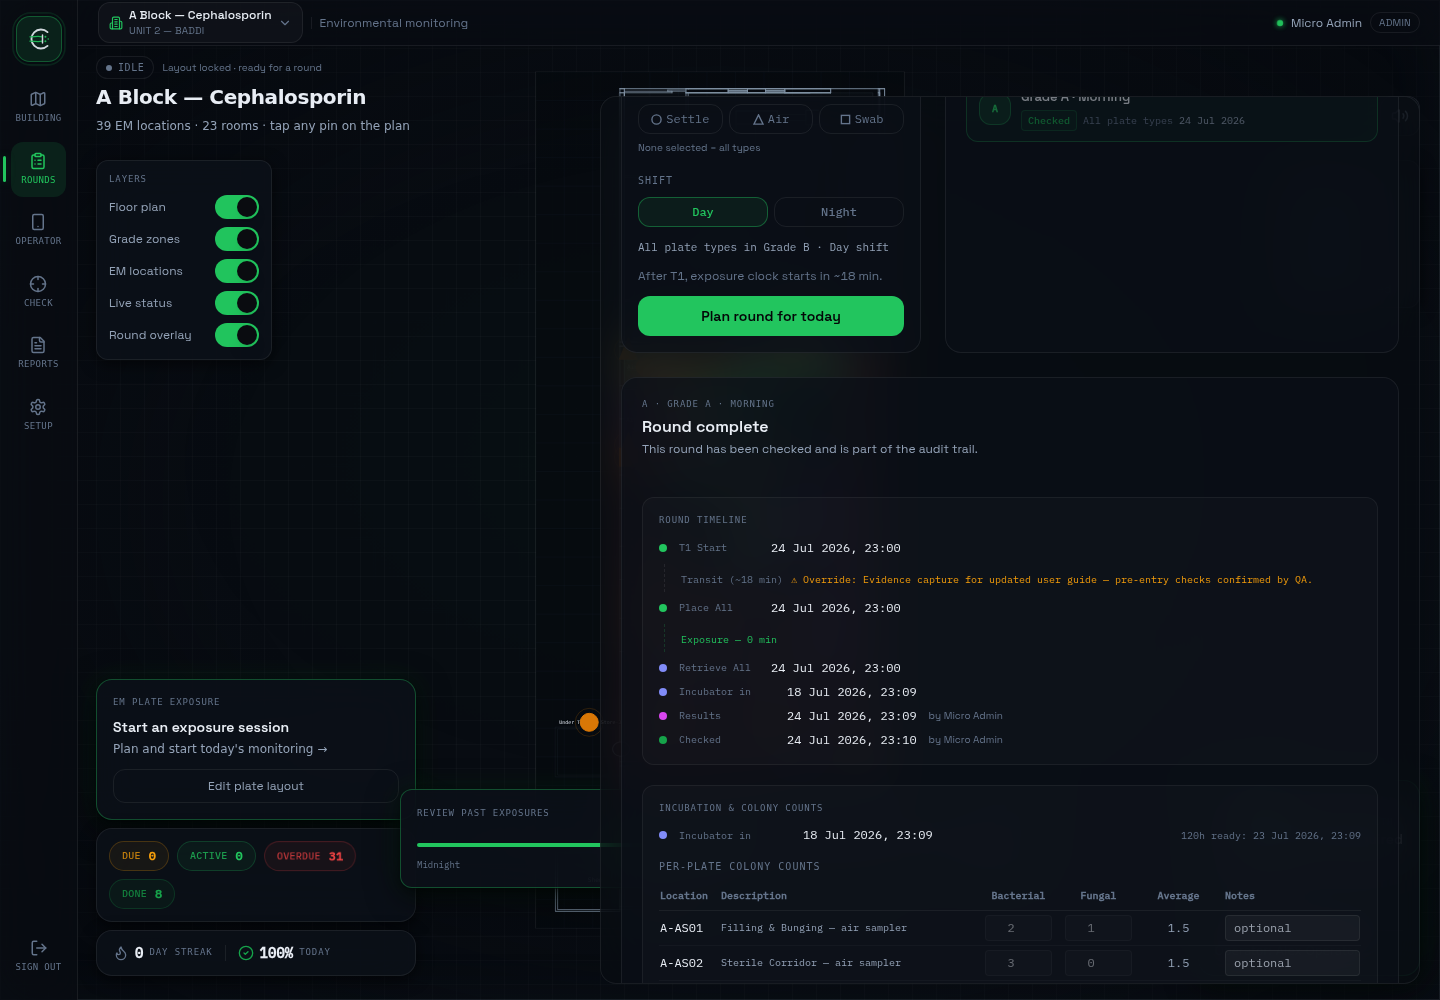
CheckedOnce every plate has counts saved and the incubation gate has been satisfied, click Mark checked. The round becomes immutable — no further edits to counts are possible through the app. Checked rounds appear in the Reports page for PDF export.
⚠Cancelling a round
05 — Check mode
Mapping EM plates
Before running any rounds, a Checker must pin every EM location onto the floor plan and freeze the layout. Operators cannot move pins once it's frozen — which protects the map's integrity during live rounds.
Switch to Edit mode
Click Edit in the top-right of the Check panel. The canvas enters placement mode — existing pins become draggable and a cursor prompt appears on the floor plan.
Add a new plate
Click anywhere on the floor plan to drop a pin. The system auto-assigns a code based on the room it lands in (e.g., A-01, B-03). Codes can be renamed in Setup.
Reposition a plate
In Edit mode, click and drag any existing pin to its correct position. Pins snap to a 30 cm grid to maintain spatial accuracy.
Remove a plate
Right-click (or long-press on touch) a pin to open the context menu, then choose Remove. Removals are audit-logged with your name and timestamp.
Freeze the layout
When all plates are confirmed, click Freeze. The layout locks — no operator can move or remove plates during live rounds. Only Checkers and Admins can unfreeze to make adjustments.
06 — Reports & PDF
Three types of GMP record
Every completed round is a permanent record. The Reports page offers three views — each exports its own GMP-formatted PDF for your site file. All three share the same A4 design: gradient accent rule, metadata strip, doc-ref ID, and a sign-off block.
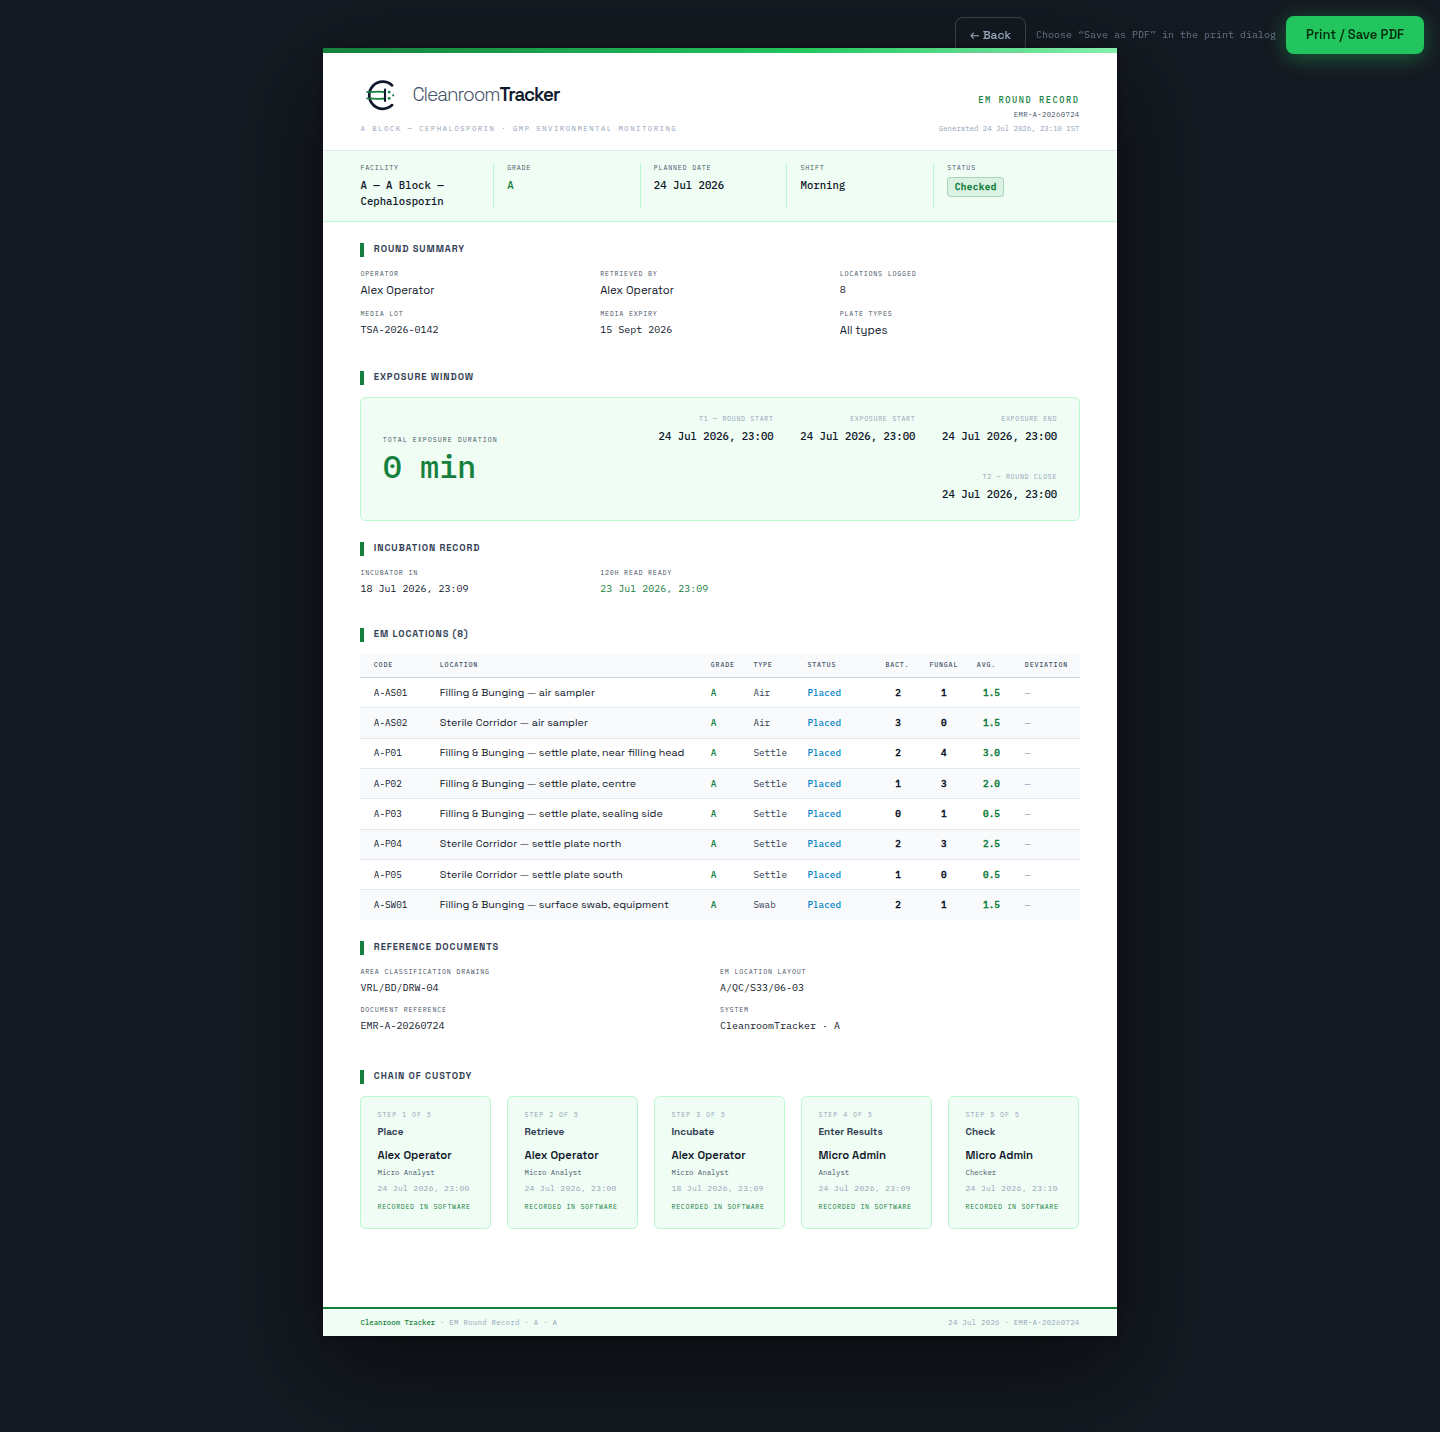
The primary record for a single EM round. Generated from the Round Records tab. Contains: facility metadata, media lot number, start, Place All, Retrieve All, and incubation timestamps, calculated exposure and incubation durations, a full EM locations table with per-plate counts and deviation flags, reference document IDs, and a chain-of-custody block.
✦Chain of custody
A longitudinal view of a single EM location across all rounds in a date range. Generated from the Location History tab by clicking PDF ↓ next to any location. Contains: location code, room, grade, EM method, and an exposure history table with date, shift, operator, lot number, exposure duration (calculated from PLACED to RETRIEVED), and result per round. Deviation rows are highlighted in amber.
A bird's-eye view of all rounds and locations for a given period. Generated from the Facility Summary tab. Contains: grade coverage breakdown table (active locations vs. sampled, coverage %, events logged, rounds run), a full completed-rounds list with operator and lot number, reference documents, and a sign-off block.
⚠Coverage warning
How to export
Click PDF ↓ on any record. A print-ready A4 page opens in a new tab. The browser print dialog opens automatically — choose Save as PDF. The ← Back button in the toolbar returns you to the app.
Date range filter
Use the From / To pickers at the top of the Reports page to narrow the date range before exporting. All three report types respect the active filter.
Status colour coding
Checked (green) = signed off, immutable. Closed (amber) = exposure done, awaiting incubation/check. Live (pulsing green) = round in progress. Cancelled rounds are excluded from all exports.
Pagination
The Round Records tab shows 10 rounds per page with previous / next controls. Page resets automatically whenever you change the date filter.
07 — Setup
Configuring the system
Checkers and Admins can open Setup via the icon at the bottom of the nav rail. Before your team runs their first round, work through each tab in order.
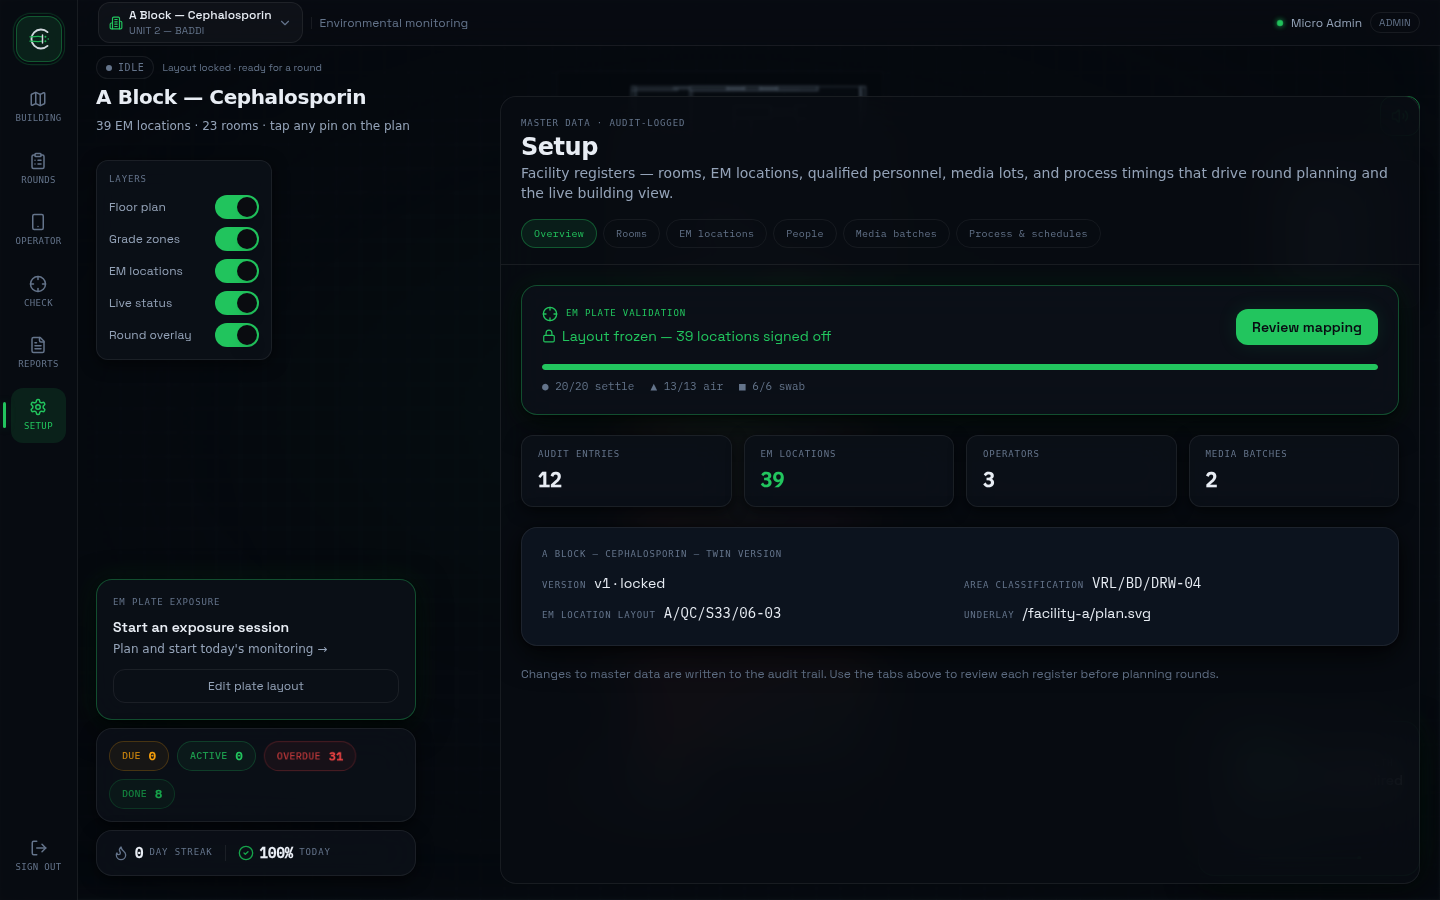
Manage who can access the system and what they can do. Admin only for account changes.
- Create accounts with full name, email address, and assigned role
- Reset a login password — people cannot do this themselves; tell them the new password in person
- Assign role: Operator, Checker, or Admin
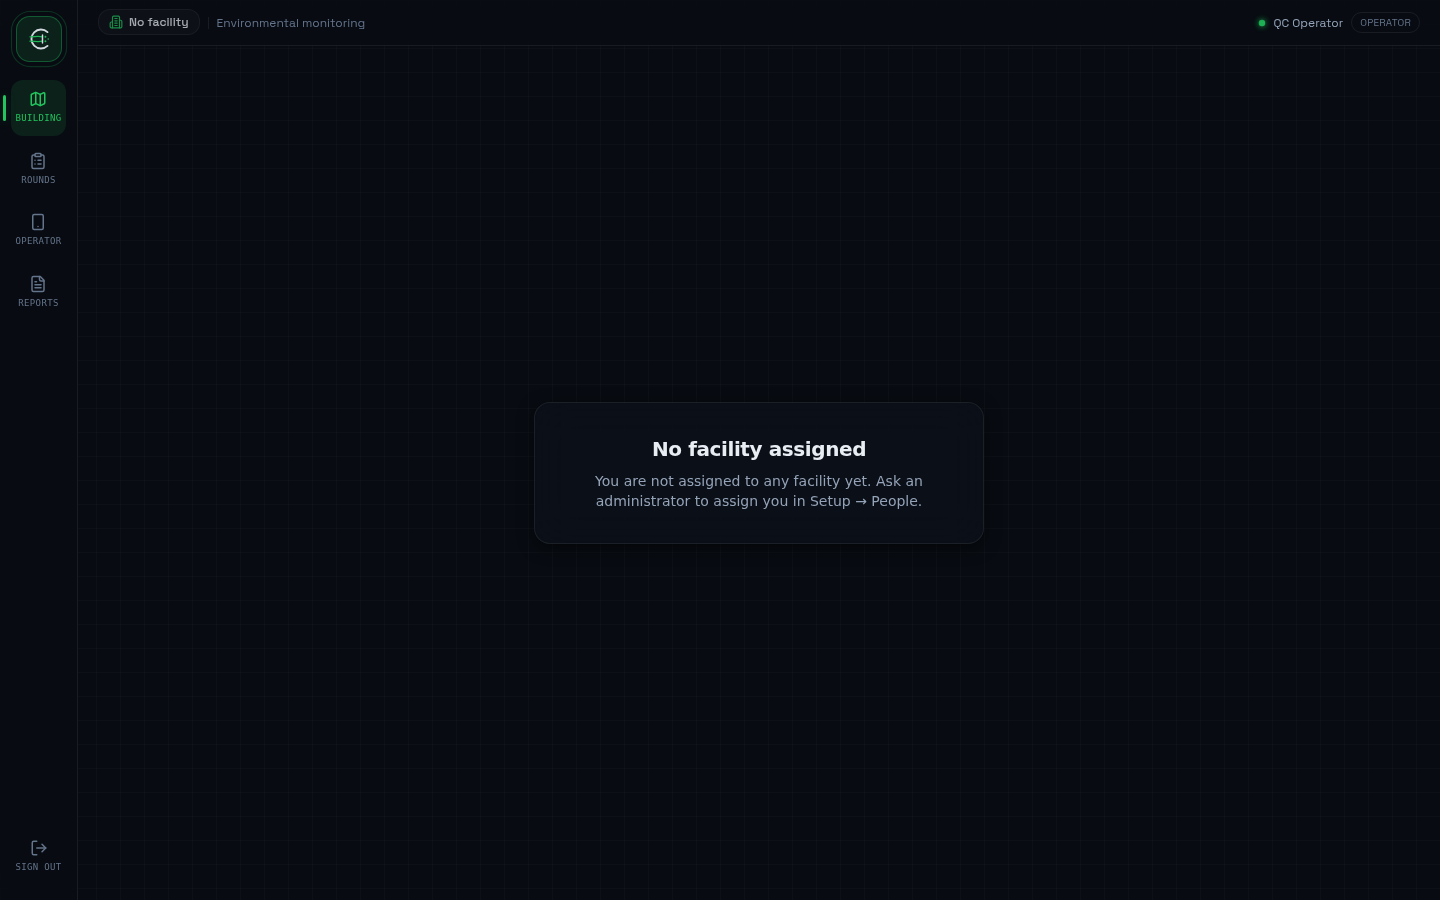
- Assign each operator to the facility (or facilities) they work in — an unassigned operator sees "No facility assigned" after signing in
- Deactivate accounts — deactivated users cannot sign in, but their full audit history is preserved
Track media batches so every round is linked to a specific lot. Checker or Admin.
- Add batches: lot number, media type (TSA, SDA, etc.), expiry date, quantity
- Expired batches are flagged — operators see a warning if they try to select one
- Incubation days set per batch — shown on the PDF record and in the post-close checklist
Set grade-zone entry buffers so operators know exactly when to enter. Checker or Admin.
- Configure gowning time + walk-to-first-plate time + exit time per grade zone
- These offsets appear on screen after T1 is captured, telling the operator when to move
- Grade A and B typically require longer gowning — configure each grade independently
First login checklist
- 01
Sign in with the seed admin credentials from your deployment configuration
- 02
Go to Setup → People — create a real admin account with your own email and password
- 03
Deactivate the seed admin user
- 04
Create Operator and Checker accounts for your team members
- 05
Assign each operator to the facility (or facilities) they'll work in
- 06
Go to Setup → Media — add your current media batch (lot number, type, expiry)
- 07
Go to Setup → Process — set grade-zone entry offsets for your facility
- 08
Open Check mode — pin all EM plate positions to the floor plan
- 09
Freeze the layout once all positions are confirmed
Once you reach the last step — you're ready to run your first round.
You're all set
Every round. Every plate. Every timestamp.
Cleanroom Tracker keeps the paper trail so your team doesn't have to. Sign in, run your round, export the record. That's the whole workflow.
Sign in to Cleanroom Tracker →